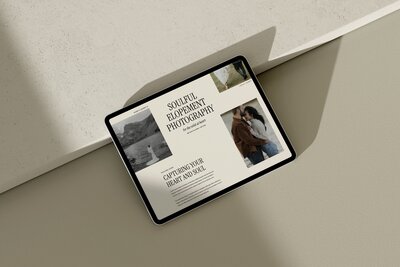
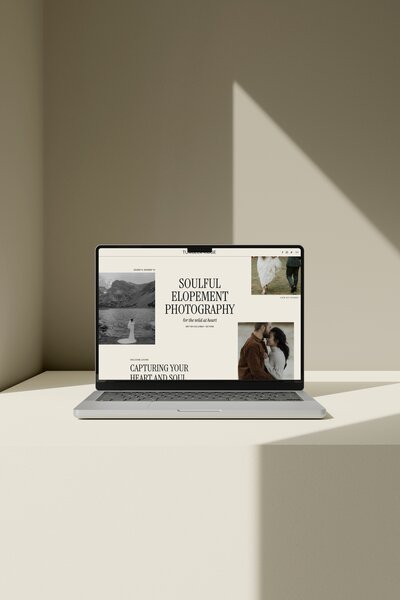
You are ready to invest in a website that finally reflects the quality of your business. Exciting, right?
A professional website designer can turn your ideas into a strategic online home, but the strongest projects are collaborative. Your designer brings the structure, creative direction and technical expertise. You bring the information, visuals and decisions that make the website genuinely yours.
You do not need every tiny detail figured out before sending your first enquiry. A good designer can help you clarify the project. But gathering the essentials below before design begins will make the process smoother, reduce delays and help you get far more from your investment.
Here is what to prepare before working with a website designer.

1. Clear Business and Website Goals
Before discussing colors or layouts, get clear on what the website needs to do for your business.
Do you want it to:
- Generate more photography enquiries
- Help you book a specific type of client
- Position your business at a higher price point
- Sell digital products or education
- Grow your email list
- Answer common questions before someone contacts you
- Showcase a new style of work
Choose one primary action you want visitors to take. That could be enquiring, viewing your services, booking a call or joining your email list. Your website can support several goals, but one should guide the overall journey.
Your designer will also need to understand your audience. Be ready to explain who you want to attract, what they are looking for and why they should choose you instead of another photographer.
2. A Brand Foundation
Your brand is more than a logo. It gives your designer the visual and strategic direction needed to create a cohesive website.
Ideally, your brand handoff will include:
- A primary logo
- A secondary logo
- A submark or icon
- Brand color HEX codes
- Primary and secondary typefaces
- Licensed webfont files if you use custom fonts
- Basic brand guidelines
- Your brand voice and key messaging
Logo files should be supplied in useful formats such as SVG, transparent PNG or EPS. If your typefaces are not free Google Fonts, confirm that you own the correct webfont licence and provide WOFF or WOFF2 files when required.
If you do not have full professional branding yet, tell your designer before the project begins. Some designers offer branding or can refer you to someone who does. At minimum, you need a consistent visual direction rather than asking the website to create an entire brand from nothing.

3. A Domain You Own and Control
Your domain is the address people use to find your website, such as vanillaandoak.ca.
The most important rule is that the domain should be registered in your name, inside an account you control. Use your own email address, payment method and recovery information. Turn on automatic renewal and two-factor authentication so an expired card or forgotten password does not put your website at risk.
Google Domains is no longer available for new registrations. Squarespace acquired Google Domains and migrated the existing accounts, so old advice recommending Google Domains is now outdated.
When choosing a registrar, look for:
- Clear renewal pricing
- Two-factor authentication
- Reliable DNS management
- Domain privacy where it is available
- Responsive support
- A simple process for transferring the domain later if needed
Domain privacy is included by some registrars and offered separately by others. Availability can also depend on the type of domain you choose. Check what is included before paying.
Do not hand ownership of your domain to a designer, assistant or website platform. Your designer can help connect it, but your business should remain the legal owner.
4. The Right Website Platform and Hosting Plan
You do not necessarily need to choose a platform before your first conversation with a designer. You do need to understand which platforms they specialize in and whether that platform suits your business.
Ask about:
- How easily you can update the website yourself
- Whether hosting is included
- Blogging capabilities
- Ecommerce or payment integrations
- The ongoing subscription cost
- Support after launch
- Whether the platform can grow with your offers
Showit includes hosting for your website content within its subscription, but your custom domain stays with a separate domain registrar. You connect the domain to Showit rather than transferring ownership of it. Showit explains its hosting setup here.
Showit is a particularly strong fit for photographers because it gives you creative control over the design while keeping updates manageable without code. If you plan to blog, choose a Showit subscription that includes the WordPress blog.

5. A Page List and Functionality Wishlist
Your designer needs to know the approximate size and scope of the website before providing an accurate quote or timeline.
Start with a list of the pages you think you need. A photographer’s website will often include:
- Home
- About
- Portfolio
- Services or experience
- Individual service pages
- Blog
- Contact
You may also need pricing, education, resources, frequently asked questions, location pages or a dedicated landing page.
Then list any functionality the website needs, such as:
- A contact or enquiry form
- Email list signup
- Scheduling calendar
- Client portal link
- Online shop
- Digital product checkout
- Embedded video
- Instagram feed
- Private pricing guide
- Blog search or category pages
This prevents important features from appearing halfway through the project and changing the scope. If you are unsure where to begin, read the only five pages your photography website actually needs.
6. Website Copy Before Design Begins
Your website should be designed around your message, not filled with words after the layout is finished.
Final or near-final copy helps your designer create the right hierarchy, choose meaningful image placements and build calls to action around what you actually want to say. A short paragraph and a detailed sales section need completely different layouts.
A website copywriter can help you clarify:
- Who you serve
- What makes your approach different
- How your services work
- What potential clients need to know before enquiring
- The objections preventing them from booking
- The next step you want them to take
If professional copywriting is outside your budget, ask whether your designer provides a copy workbook or prompts. You can write the copy yourself, but it still needs to be complete before the main design stage.
At minimum, prepare:
- Your headline and introduction
- About copy
- Service descriptions
- Process or experience
- Frequently asked questions
- Calls to action
- Contact information
Avoid sending rough notes and expecting your designer to turn them into conversion copy unless copywriting is specifically included in the project.

7. Curated Portfolio Images and Brand Photography
For a photographer, the issue is not usually finding professional images. It is choosing the right ones.
Your website does not need every photograph you have ever delivered. It needs a curated collection that represents your current style and the work you want to book next.
Prepare:
- Your strongest portfolio images
- A mix of horizontal and vertical photographs
- Images from the services you want to prioritize
- Updated headshots or personal brand photos
- Behind-the-scenes photographs if they support your story
- Any required client permissions
Your own brand photos matter too. Potential clients want to see the person they may spend hours with on an important day. A professional headshot and a few natural working images help build that connection.
Plan your brand shoot after your brand direction is clear and before website design begins. Share the planned page list with your photographer so they can capture the orientations, negative space and visual variety the website needs.
Before uploading anything, follow this guide to prepare and resize images for your Showit website.
8. Your Offers, Pricing and Proof
Design cannot create clarity if the offer itself is still changing every week.
Before the project begins, confirm:
- The services or products you want to feature
- Who each offer is for
- What is included
- Whether pricing will be public
- Your booking or enquiry process
- Your service areas
- Your most common questions
Gather proof that helps potential clients trust you too. This might include testimonials, client feedback, publication logos, awards, experience, meaningful statistics or recognizable venues where you have worked.
Give your designer the final approved wording and any permission needed to use names, photographs or logos.

9. An SEO and Redirect Plan
If you already have a website you need to consider your SEO and ensure this will be handled by someone. You don’t want to lose any good SEO that you have earned and start fresh.
If you already have a website, provide:
- Your current page URLs
- Google Search Console access
- Google Analytics access
Your designer or SEO specialist can then plan redirects so valuable old URLs do not lead to errors after launch. This is especially important during a redesign or platform migration.
For a new website, clarify the services, locations and topics you want the site to become known for. These decisions influence page structure, copy, headings and internal links.
Read how Showit website design affects SEO before your project starts so design and search strategy support each other from the beginning.
10. Accounts for Your Website Integrations
You do not need every business system imaginable, but your designer needs to know which tools will connect to the website.
Common integrations include:
- Email marketing platform like Flodesk and Kit
- Customer relationship management system like Dubsado
- Scheduling software like Calendly
- Payment processor
Create these accounts in your own name and choose the forms, calendars or products you want embedded. Your designer can style and place the connection, but they should not be expected to choose your entire business system during the website project.
If you plan to create a free resource for your email list, prepare the resource, signup form, thank-you page and welcome emails early. The website experience will feel much more intentional when the whole path is planned together.

11. Legal Pages and Consent Requirements
Your designer may create the page layout, but they are not responsible for writing legal documents unless that service is explicitly included.
Depending on your business and where you operate, you may need:
- Privacy policy
- Website terms and conditions
- Cookie notice or consent controls
- Affiliate disclosure
- Accessibility statement
- Refund or cancellation policy
Legal requirements vary by location, audience and how your website collects information. Work with a qualified professional or use a reputable legal template designed for your jurisdiction. Do not copy another business’s policy.
Provide the approved documents before launch so your designer can link them correctly in the footer and forms.
12. Secure Access to the Accounts Your Designer Needs
Your designer may need access to your domain registrar, Showit account, analytics tools or integrations during the project.
Use collaborator access whenever a platform provides it. If you must share a login, use a password manager rather than sending passwords in an email or project document. Turn on two-factor authentication and agree on how temporary access will be removed after launch.
Create one organized folder containing:
- Brand files
- Website copy
- Portfolio images
- Brand photographs
- Testimonials
- Legal documents
- Integration details
- Existing website exports or backups
Clear filenames and final versions save hours of searching and prevent the wrong asset from ending up on the live website.
13. Time for Feedback and Decisions
Your website project still needs your participation after the files are handed over.
Set aside time to:
- Complete the designer’s questionnaire
- Review page designs
- Give clear, consolidated feedback
- Approve copy and images
- Test forms and links
- Check the mobile website
- Learn how to make basic updates
If several people need to approve the website, choose one person to collect and send the feedback. Conflicting notes from several decision-makers can slow the project and weaken the final design.
Ask about feedback deadlines before booking and make sure they fit your schedule. A project can only stay on timeline when both the designer and client are available.
Your Website Designer Checklist
Before design starts, aim to have:
- Clear website goals and target audience
- Brand files and guidelines
- A domain registered in your name
- An agreed platform and hosting plan
- A page list and functionality wishlist
- Final or near-final website copy
- Curated portfolio and brand photographs
- Confirmed offers, pricing and testimonials
- An SEO and redirect plan
- Accounts for required integrations
- Approved legal pages
- Secure account access
- Time blocked for feedback
You do not have to prepare all of this alone. Your designer should guide you through their process and tell you exactly what is required for your project. Arriving with these foundations simply means more of your investment can go toward strategic design instead of chasing missing content.
Do You Need Custom Design or a Showit Template?
Custom design can be the right investment when your business has complex offers, a highly specific strategy or a brand that needs a completely original digital experience.
But custom design is not the only way to launch a professional website.
If your brand, copy and photography are ready and you want a faster, more affordable path, a Showit template gives you a thoughtful structure that you can customize yourself. You still control your colors, fonts, images, copy and page flow without starting from a blank screen.
Learn how customizable Showit templates really are or browse the Vanilla + Oak Showit website templates for photographers.
Already preparing to launch? Download the free Showit Website Template Launch Checklist for a step-by-step path from setup to publish.
DOWNLOAD A FREEBIE
How to Launch a Showit Website Start to Finish
Looking to launch your dream website, but feeling overwhelmed with where to start? From purchasing your domain to publishing your site, this checklist will guide you through each step so you can launch your website with ease.